

I wanted to create a research partner to help me work through theological questions. Andy Pattison motivated me with the work that he had done with ChatGPT. I liked what he did, but I wanted to add more perspectives from other theologians.
The pattern I am going to demonstrate will work on any research you want to do. I use the free version of Claude from Anthropic. I do my work entirely online, and you will need an account for this to work. So, if you want to follow along, open Claude on your browser and create your account or sign in if you already have an account.
NOTE: This is intended for normal users of AI. If you are an expert user of AI, you will likely find this simplistic.
Now, pick your topic or use mine. Let’s get started.
Prep work, establishing your sources
The first step is to build your library. Who do you want Claude to use when answering your questions? If you are like me, you may have a short list of authors or sources you trust and want to make sure are included. I started with the following:
- John MacArthur
- CS Lewis
- Timothy Keller
- Watchman Nee
I wanted a wider selection to expand my perspective. In my case, I used Microsoft Copilot to work through my discovery. Any AI tool will work for this part. Here’s the prompts I used to expand my list of sources.
Who are considered great theologians and why?Why is a significant part of the prompt. Copilot gave me details about people on the list which helped me choose and eventually prioritize who to include. One thing I didn’t ask for but greatly appreciated was the list was separated by time period. Here is the first part of the response which describes great theologians and the organization of the list.
“Great theologians” are usually those whose thinking shaped how later generations understood God, faith, and religious life. They’re recognized not just for intelligence, but for lasting influence, clarity, originality, and the way they responded to the questions of their time.

Below is a representative overview, grouped by historical period and tradition. (There’s no single “official” list—different churches and scholars emphasize different figures.)
I followed this up with “who are considered peers of John MacArthur?” I wanted to explore other options who taught while MacArthur taught. Next, I expanded the list with these prompts: “who are some of the most influential Christian authors in the 20th century?” and “how about this century?” With these prompts, I built a list of more than fifty potential sources to work with.
Extracting your list
Use the following prompt to extract the list to a text file.
Output the list of all the individuals in this chat to a text fileOpen the file and make sure list looks correct. Keep the file open so you can make refinements.
Refining your list
Let’s take the following steps to prepare our list for our assistant. We need to make the list more manageable for AI to use.
- Remove any sources you don’t want to use for any reason.
- Pick the top 5-10 sources you want to use most of the time.
- Add a header to the top of the file:
# Author list - Add another header:
## Limit to these authors and theologians - Add this header to the bottom:
## Prioritize these authors. - Move your top sources under this header.
- I added one more line to end:
Use best results from remaining authors.
AI likes a file type called markdown. The # signifies a header. We use them in our file to help organize our file for Claude. I also added hyphens to designate items in a list. This is helpful but not required. Here is what my finished file contains.
# Author list

## Limit to these authors and theologians
- CS Lewis
- John MacArthur
- Timothy Keller
- Watchman Nee
- Charles Spurgeon
- Augustine of Hippo
- John Calvin
- Martin Luther
- Karl Barth
- John Piper
- Francis Schaeffer
- John Stott
- N.T. Wright
- Lee Stroebel
- John Ortberg

## Prioritize these authors
- CS Lewis
- John MacArthur
- Watchman Nee
- Timothy Keller
- Augustine of Hippo

Use best results from remaining authors
Save your file for later. Next, we will work on getting our Claude project set up.
Create a Claude project, shaping your assistant
Now is time to use Claude. We are going to create a project. A project is the box that contains the instructions for Claude to use. It has two key components
- Instructions
- Documents
First, we’ll create our project.
Create your project
- Click on Projects in the left side menu. If you don’t see the menu, it is likely collapsed. You can expand using the button highlighted it in the image below.
- Click the New project button.
- Give your project a meaningful name.
- Optionally, you can add a description.
- When you’re done, click the Create project button.

Add Instructions
Congratulations, you have created your project on Claude. Now we will build the box. Let’s add instructions.
Instructions will be applied to all chats that you create in the project. I use instructions to tell Claude how I want responses built. This includes tone or style. I have my project set to teaching style and to include references with the results. You can add more here as you learn what you like. Click the + symbol in the upper right corner of the instructions box to add instructions like what I use.
Preferred Style: Teaching
Always provide references
Always cite sources

Approved reference materials:
Bible, NLT version preferred
As you can see, I added the Bible, specifically the New Living Translation, as a specific reference. You can add rules that matter to you.
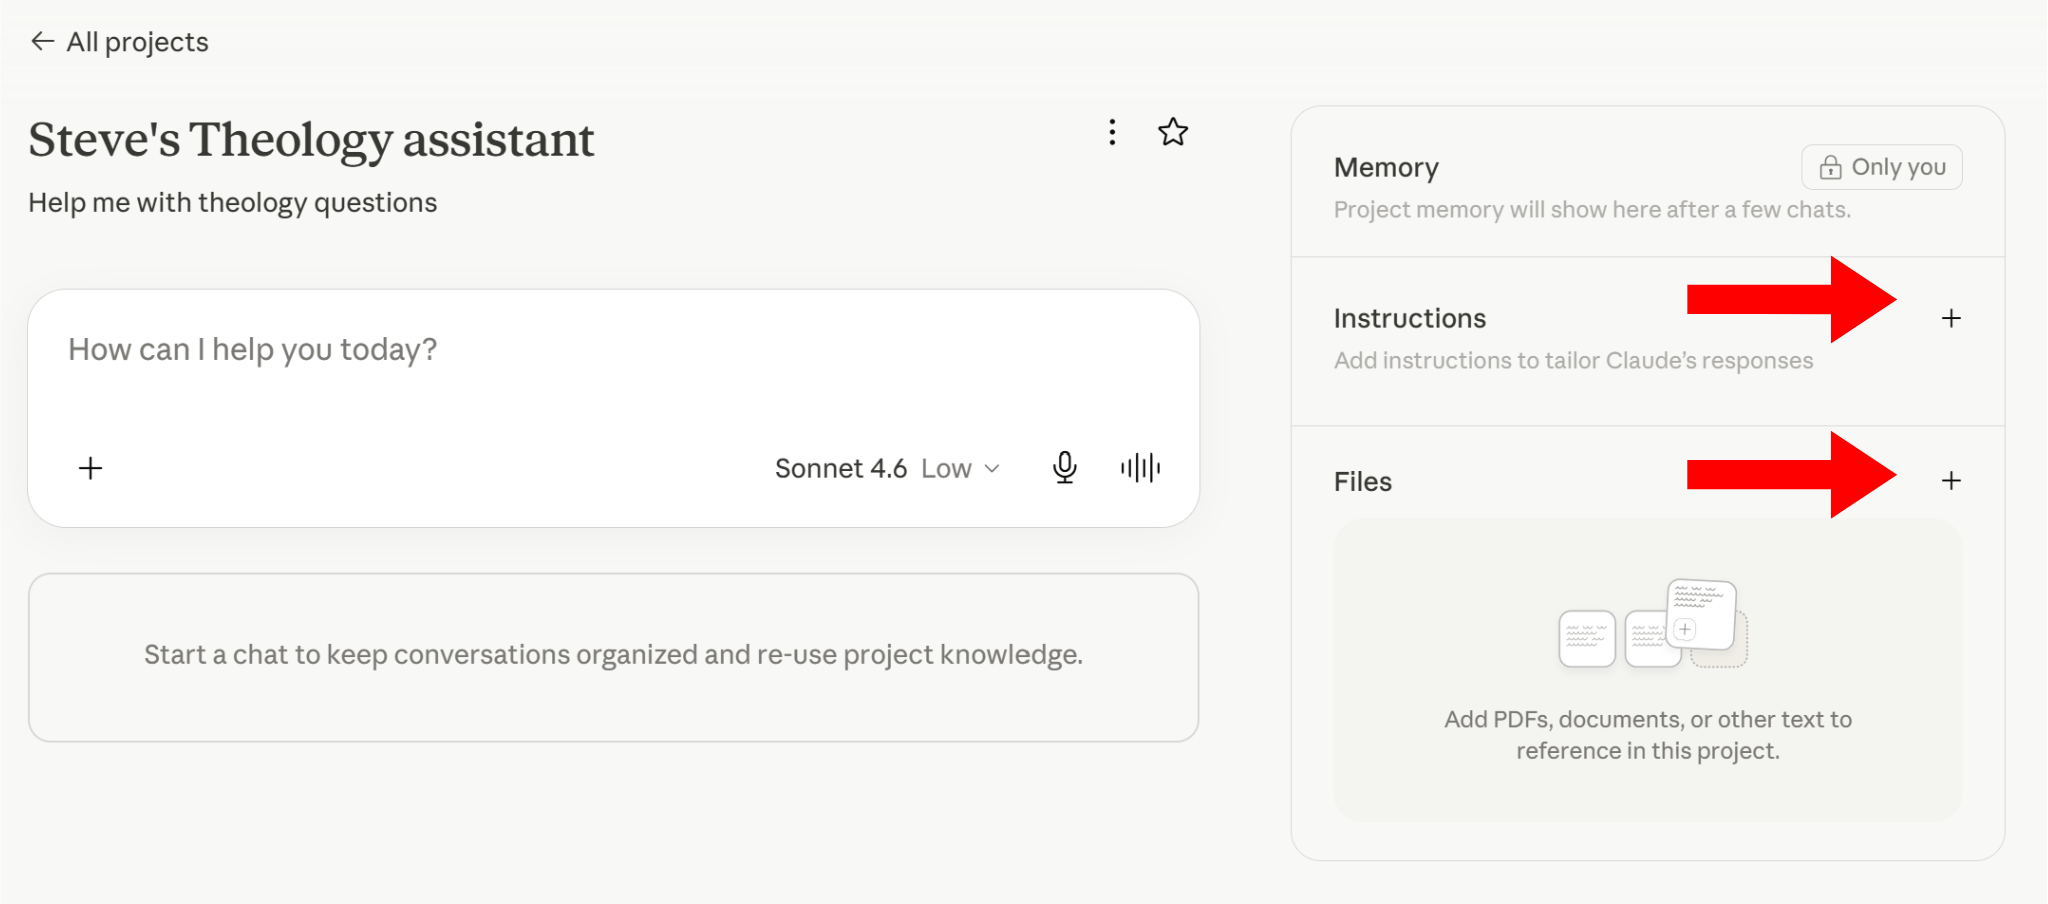
Next, let’s add our sources to complete the box for Claude to operate in.
Set the sources, building your library
Once you set instructions, you typically don’t need to make changes there. Documents give you more flexibility when managing the boundaries for your assistant.
There are two ways to add files, create them in Claude or upload them. I recommend that you upload them. This gives you a local copy that you can easily change and upload the new file. Let’s upload the file.
- Click the + in the Files area.
- Choose Upload from device.
- Select your file and upload.
If you make changes to your file, delete the existing file from your project and upload the updated file.
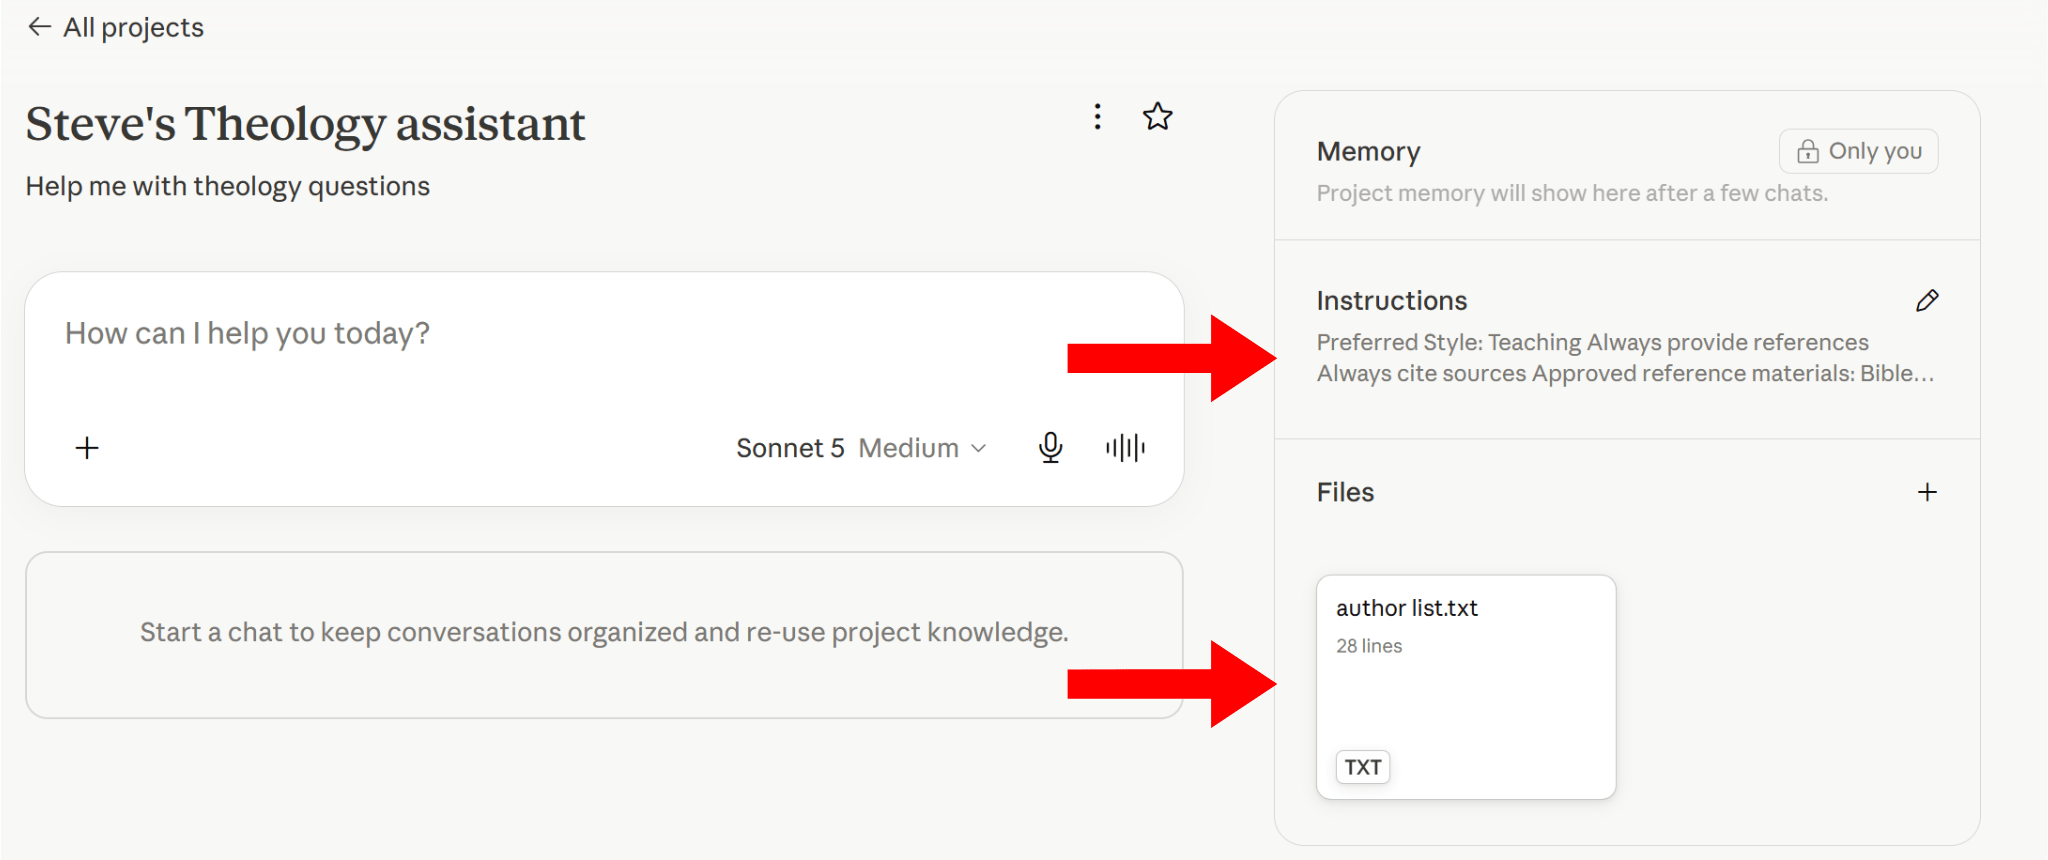
Your assistant is ready to test.
Test run
Finally, let’s give our assistant a test run. In the chat box, ask a question. Did you get the results you expected? If so, your assistant is ready to go. If not, review your file and instructions. Tweak them as needed and test again. It may take a few tries to get Claude to respond the way you want.
Before we go
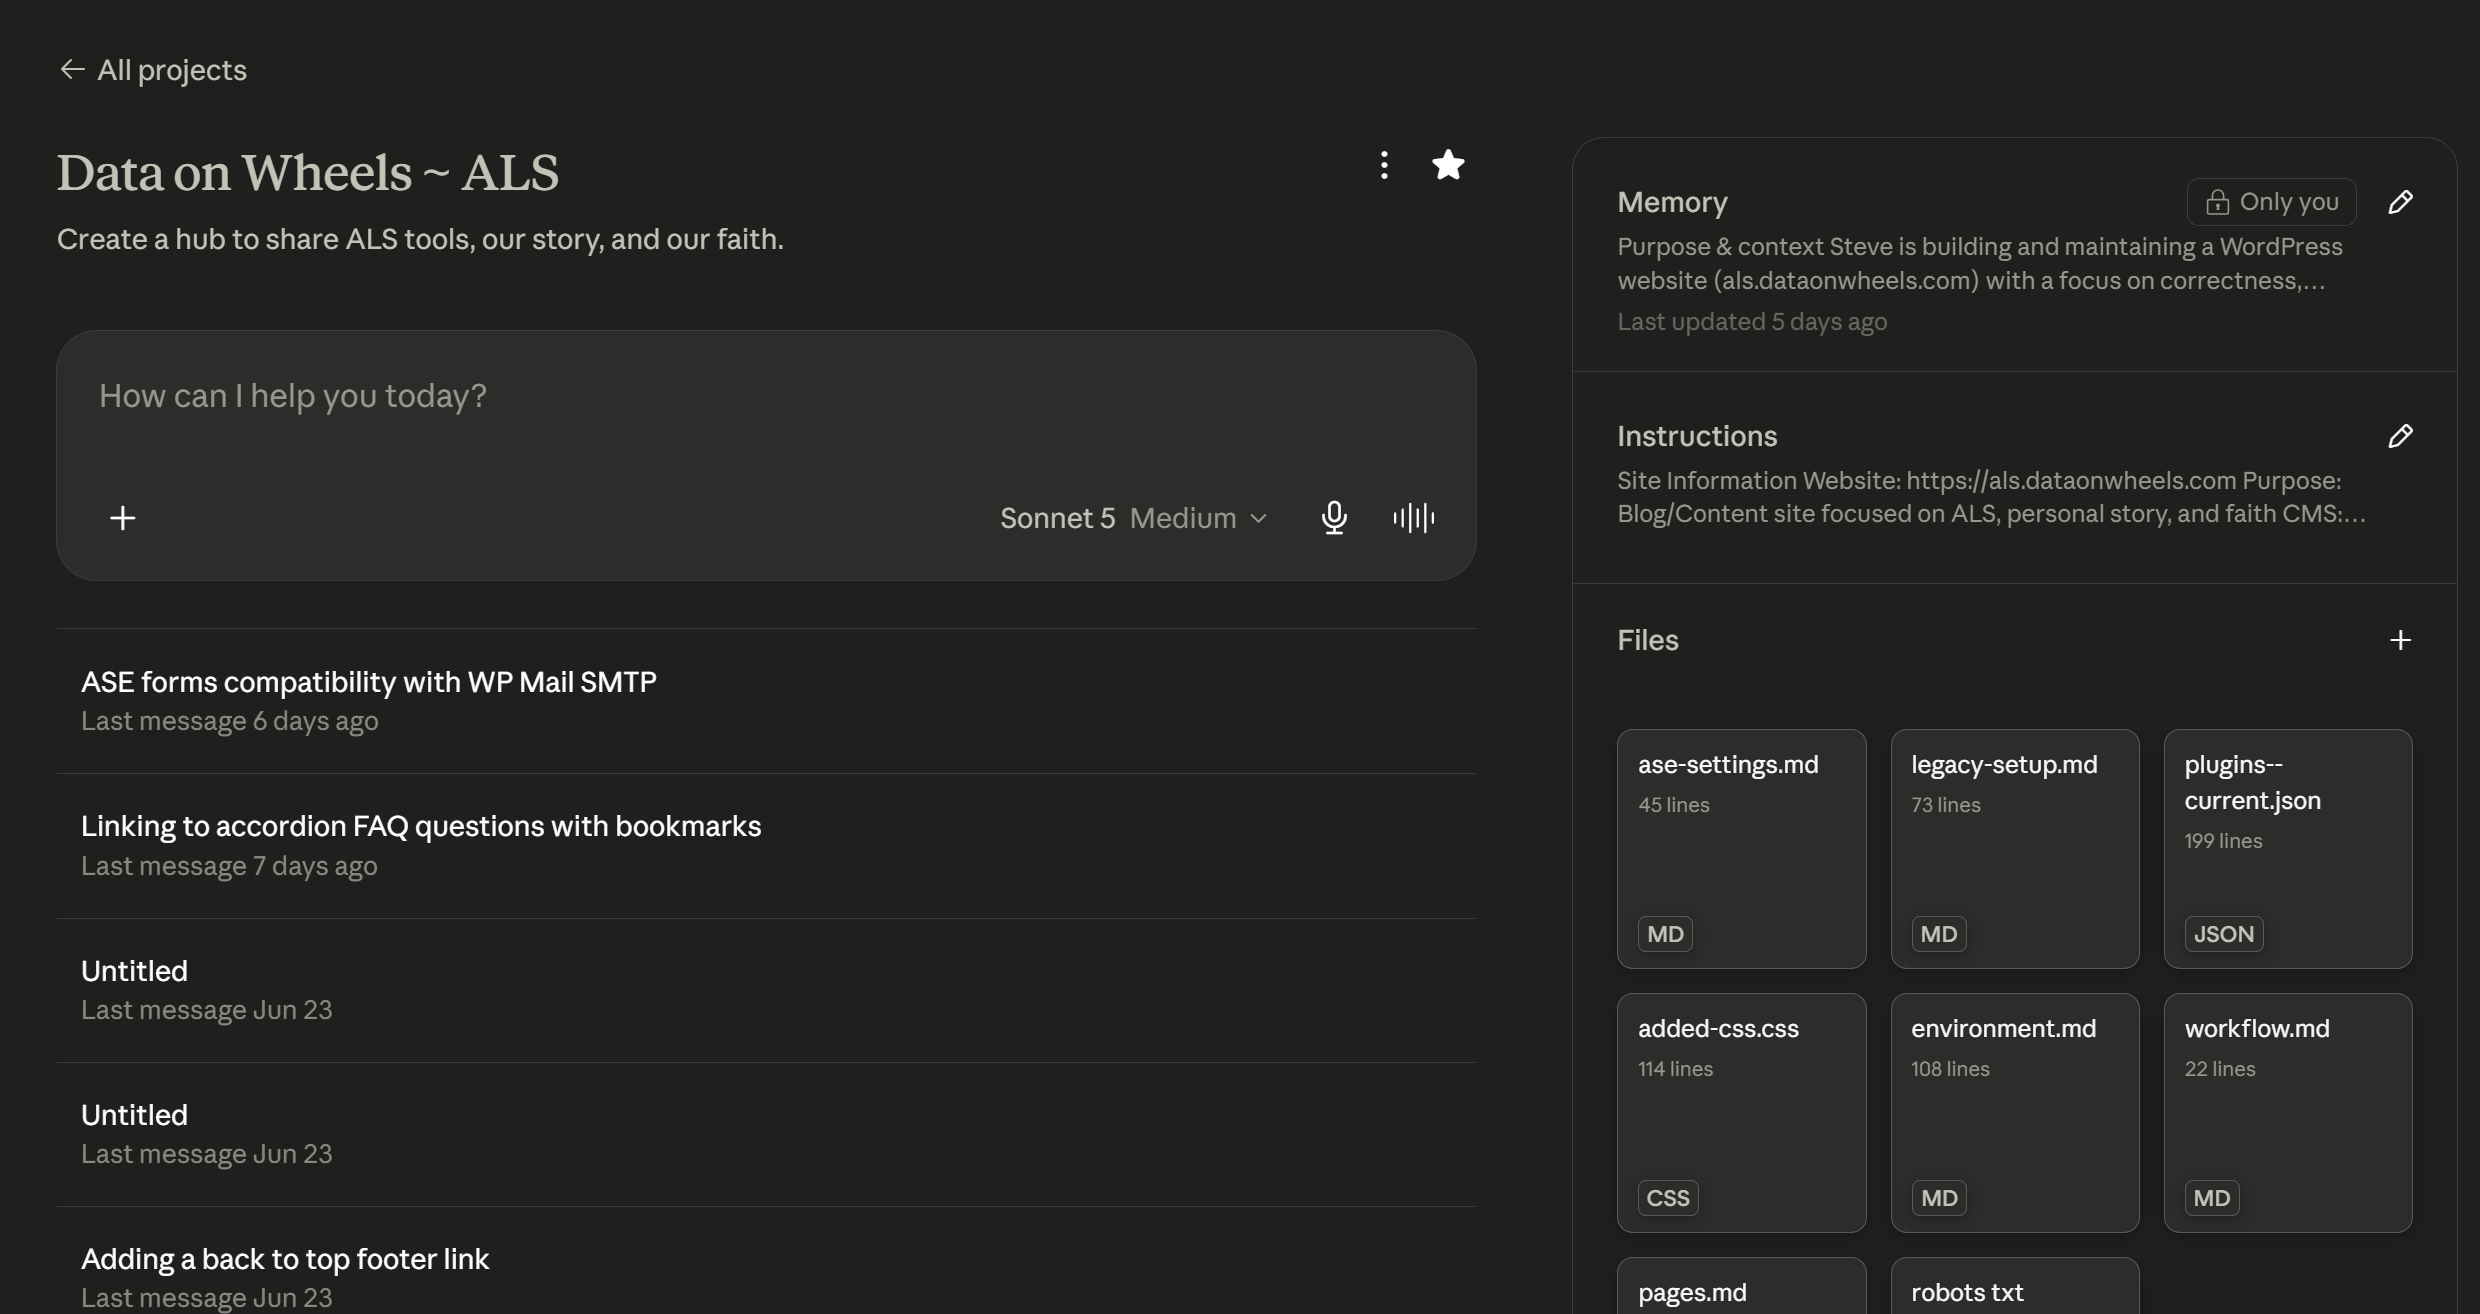
I also use a project to help manage and improve my website. I use instructions that describe my site’s purpose and my skill level. My documents include inventories and implementation specifications that Claude uses to give me more specific recommendations. It is very helpful.
I hope this inspires you to do more with AI and do it more effectively.
