
One of my big frustrations was doing the work to create a voice clone in ElevenLabs but not being able to use it on Zoom calls. Let’s be clear. It is possible to use your voice clone to talk using AAC software like TD Snap or Communicator 5 and be heard by Zoom. However, this works best with multiple devices and requires a lot of task switching.
Looking for an elegant solution
I wanted a solution that would input my voice directly into the Zoom call and still allow me to easily use the comments as well. AAC software typically takes over the full screen, so I didn’t consider them a viable option. I started working with Microsoft Copilot to find a solution to meet my goals. After some trial and error, I have a working solution. What follows is my setup and detailed instructions for the solution. Be aware that you will need caregiver help for one section of the installation. The rest of the work can be done with eye gaze.
My environment
First, this is a Windows solution. I don’t know if any of it works on iOS. I am using a Surface Pro 9 with Windows 11. I am using a Tobii PCEye5 for my eye gaze controller. Microsoft Edge is my default browser. A part of the solution requires a second browser for outputting your voice. I am using Chrome for this. If you use Chrome as your primary browser, you just need to switch the instructions to use Edge, Firefox, or another browser for your voice. Keep in mind, one goal is to make this easy for eye gaze users.
I have not tested this on my TD I-13 device yet. However, I don’t see any reason it should not work. The biggest risk is that Windows 10 is not supported and may be an issue for the virtual mic in the future.
The instructions
I generated the instructions using Copilot. I have added a table of contents to help with navigation. If you have issues or corrections, leave a comment below.
Detailed Guide for Using ElevenLabs as Your Voice on Zoom
Windows + TD Control (Eye Gaze) + Optional Self‑Monitoring + Split Screen
BIG PICTURE (What We Are Building)
By the end of this process:
- Chrome will be used only for ElevenLabs
- Chrome’s audio will be sent into Zoom as if it were a microphone
- Edge stays your default browser and is unaffected
- Zoom participants hear your AI voice clearly
- You can optionally hear yourself
- Zoom and Chrome can be side‑by‑side for easy eye‑gaze use
PART 1 — Downloading & Installing the Virtual Audio Cable
(One‑time setup; requires a short Windows permission click)
1. What the Virtual Audio Cable Does (Conceptually)
VB‑Audio Virtual Cable creates two virtual devices:
- CABLE Input → acts like speakers
- CABLE Output → acts like a microphone
Audio flow will be:
Chrome (ElevenLabs)
   ↓
CABLE Input
   ↓
CABLE Output
   ↓
Zoom Microphone
Zoom thinks your AI voice is a mic.
2. Download VB‑Audio Virtual Cable
- Open Edge (or any browser you prefer)
- Go to: https://vb-audio.com/Cable/
- Find VB‑Audio Virtual Cable
- Click Download
You will usually get a ZIP file such as:
VBCABLE_Driver_Pack43.zip
3. Extract the ZIP File
- Navigate to your Downloads folder
- Right‑click the ZIP file
- Choose Extract All
- Open the extracted folder
Inside, you’ll see several files, including:
VBCABLE_Setup.exeVBCABLE_Setup_x64.exe
4. Install the Driver (This Is Where Windows Interferes)
Choose the Correct Installer
- If your system is 64‑bit (almost all modern systems):
- ✅ Run VBCABLE_Setup_x64.exe
- Otherwise:
- Run VBCABLE_Setup.exe

⚠️ Windows UAC Warning (Important)
When you double‑click the installer:
- Windows will show a User Account Control (UAC) dialog
- TD Control will stop working temporarily
- The Yes button cannot be clicked with eye gaze
✅ You will need one physical click from a caregiver or helper:
- They click Yes
- They do nothing else
This is a Windows limitation, not something you did wrong.
Finish Installation
- Caregiver clicks Yes
- Installer runs
- Click Install Driver
- When finished, restart Windows
✅ After reboot, TD Control works normally again
✅ This step is done forever unless you uninstall
PART 2 — Confirm the Cable Installed Correctly
After reboot:
- Right‑click the speaker icon
- Click Sound settings
- Click More sound settings
Check:
Playback tab
You should see:
CABLE Input (VB-Audio Virtual Cable)
Recording tab
You should see:
CABLE Output (VB-Audio Virtual Cable)
✅ Do not set either as default
✅ Just confirm they exist
PART 3 — Using Chrome for ElevenLabs ONLY
This avoids all Edge audio problems.
5. Open ElevenLabs in Chrome
- Open Google Chrome
- Go to: https://elevenlabs.io
- Log in
- Open Text to Speech
- Type a short test sentence
- Click Play
Leave Chrome open.
6. Route Chrome’s Audio into the Virtual Cable
This step must be done while ElevenLabs is speaking.
Step‑by‑Step
- While the AI voice is playing:
- Right‑click speaker icon
- Click Sound settings
- Click Volume mixer
Under Apps, you will now see:
Google Chrome
5. Change:
Google Chrome → Output device → CABLE Input (VB-Audio Virtual Cable)
✅ Only Chrome is affected
✅ Edge, Zoom, and system sounds stay normal
✅ Windows remembers this setting
PART 4 — Configure Zoom to Hear the AI Voice
7. Basic Zoom Audio Settings
- Open Zoom
- Go to Settings → Audio
Set:
Microphone
CABLE Output (VB-Audio Virtual Cable)
Speaker
Your normal speakers / headphones
8. Critical Zoom Advanced Settings (Do Not Skip)
Zoom often thinks AI voices are “noise.”
Go to: Zoom → Audio → Advanced
Set:
- Suppress background noise: ❌ Off
- Automatically adjust microphone volume: ❌ Off
- Echo cancellation: ❌ Off
Back in the main Audio tab:
- Set microphone level manually to ~70–80%
✅ This prevents cut‑offs and syllable loss
PART 5 — Optional: Hearing Yourself Speak (Monitoring)
By default:
- ✅ Zoom participants hear you
- ❌ You hear nothing
This is normal.
9. Enable Local Monitoring (Optional)
If you want to hear your AI voice:
- Right‑click speaker icon
- Click Sound settings
- Click More sound settings
- Go to Recording tab
- Double‑click: CABLE Output (VB-Audio Virtual Cable)
- Open Listen tab
- Check: ✅ Listen to this device
- Playback device: Your normal speakers / headphones
- Click OK
✅ You hear your AI voice
✅ Zoom still hears it
✅ No echo for others
Many ALS users turn this off later once confident it works.
PART 6 — Daily Call Workflow (What You Actually Do)
- Start a Zoom meeting
- Keep Zoom open
- Switch to Chrome
- Type in ElevenLabs using TD Control (eye gaze)
- Click Play or CTRL+ENTER
- AI voice speaks live on Zoom
- Switch focus back to Zoom to listen
- Repeat
✅ No push‑to‑talk
✅ No muting/unmuting
✅ No caregiver help
PART 7 — Split Screen: Zoom + Chrome Together
Highly recommended.
Option A: Windows Snap (Keyboard or Eye‑Gaze‑Triggered)
- Make Zoom the active window
- Press: Windows key + Left Arrow
- Make Chrome active
- Press: Windows key + Right Arrow
Result:
- Zoom on left
- ElevenLabs on right
Option B: Drag to Edge (Mouse / Gaze Friendly)
- Drag Zoom window to the left edge until it snaps
- Drag Chrome window to the right edge
Recommended Layout for Eye Gaze
- Zoom window slightly narrower
- Chrome (typing area) slightly wider
This reduces eye travel and fatigue.
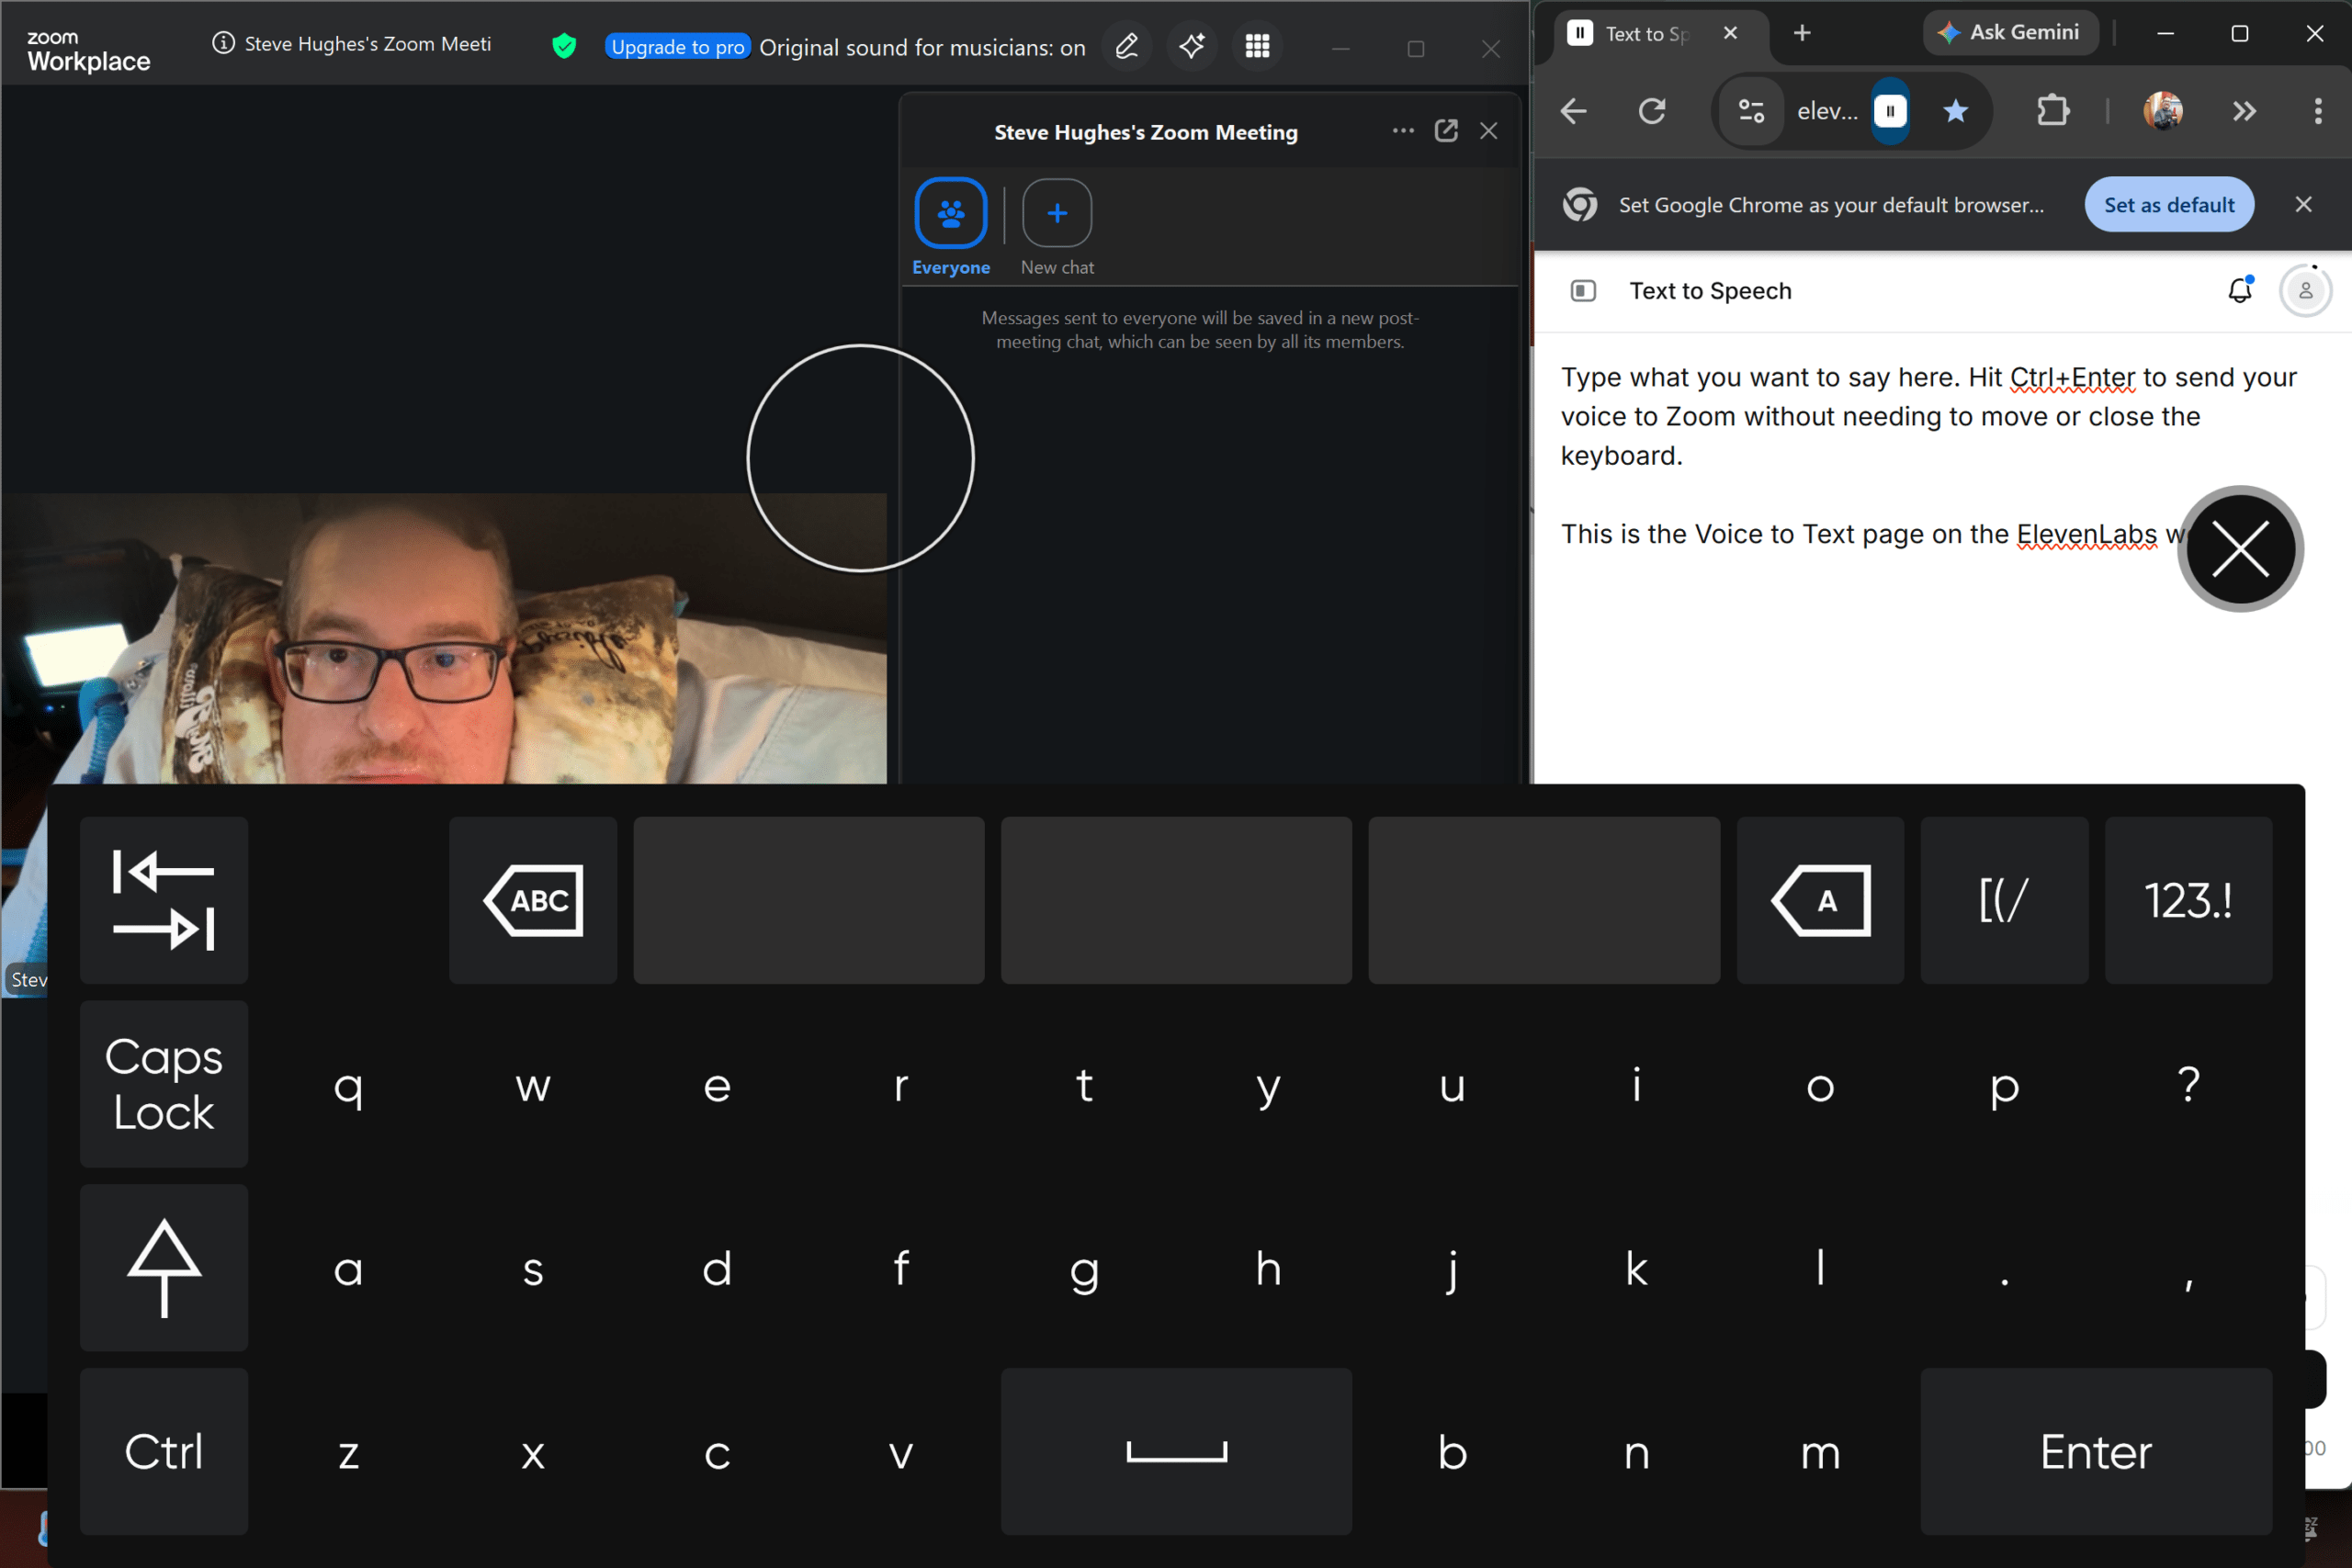
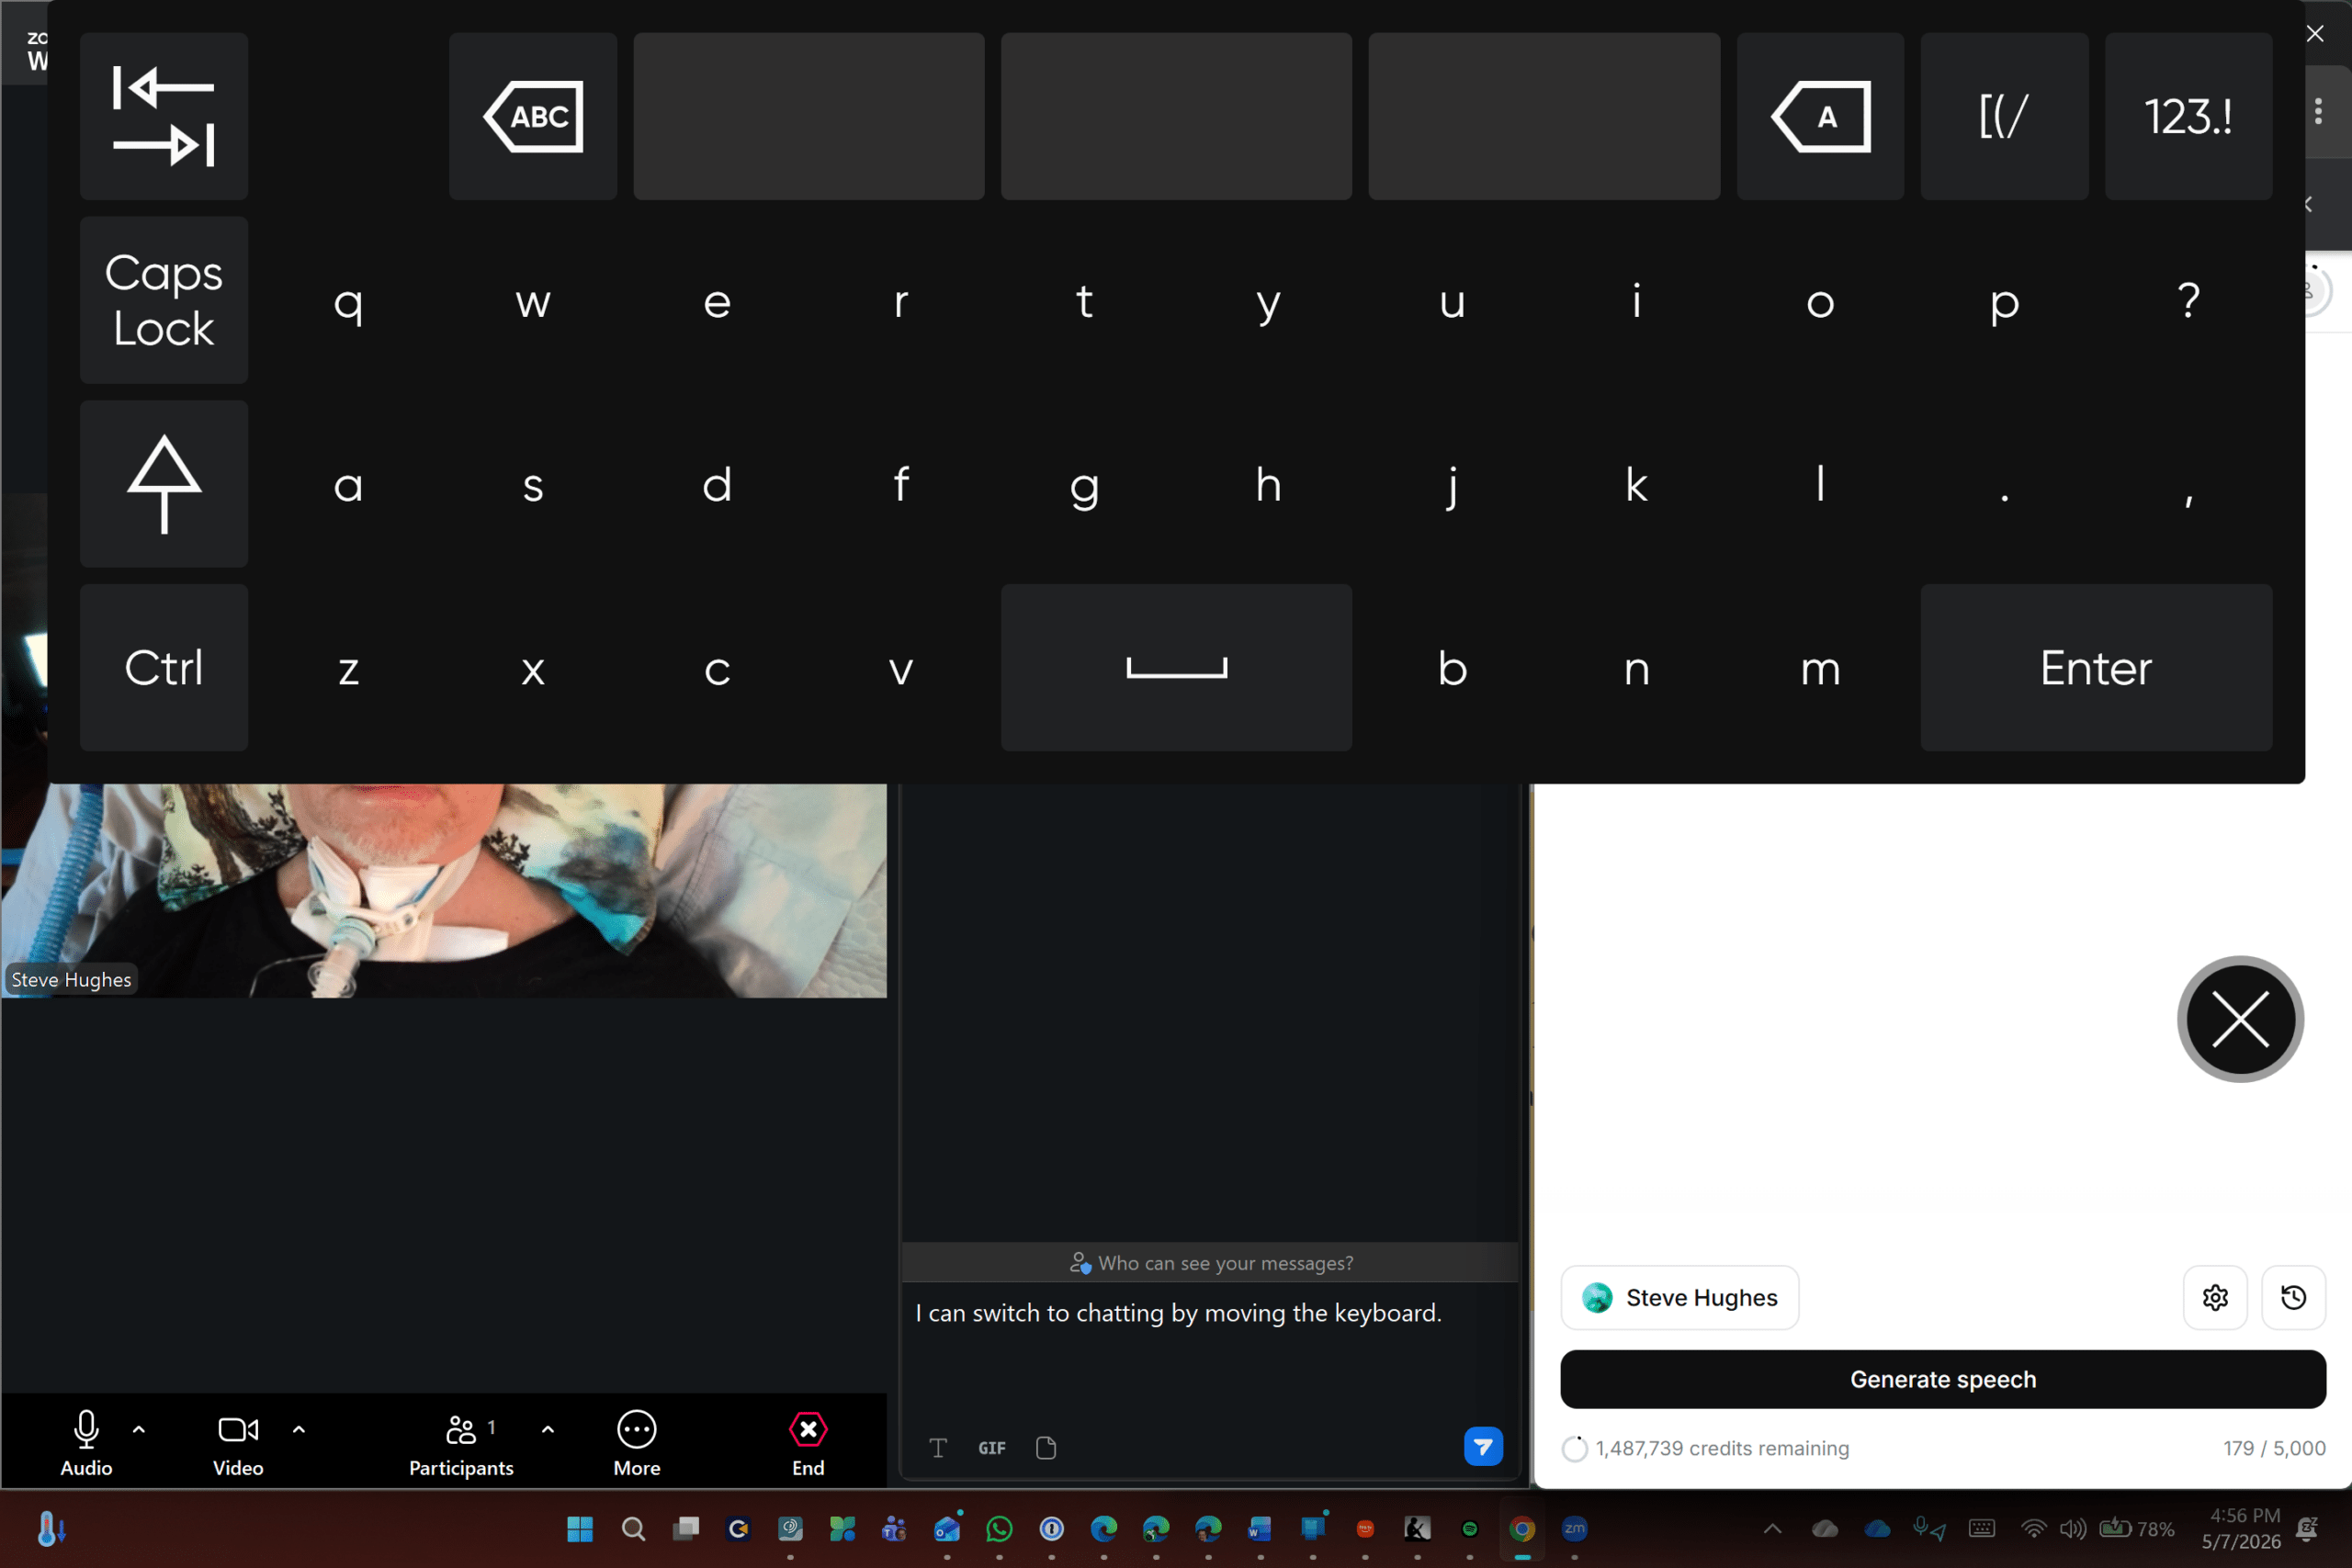
NOTE: While this is the recommended configuration, I chose to split 67% to Zoom. This let me keep the chat window open in Zoom. I am able to easily switch between talking and chatting. Check out the screenshots below to see my workflow.
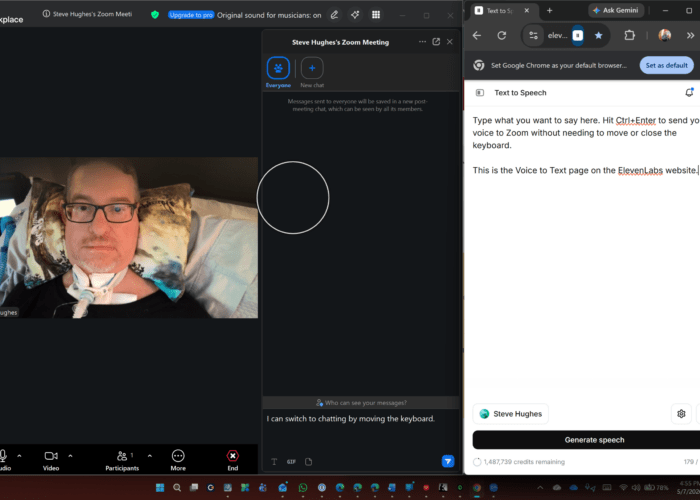 Zoom and Chrome – No keyboard
FINAL VERIFIED CONFIGURATION
Chrome (ElevenLabs only)
  → CABLE Input
  → CABLE Output
  → Zoom microphone

Edge (default browser)
  → Normal speakers

Zoom
  → Mic: CABLE Output
  → Speaker: normal speakers
This setup is: ✅ Stable
✅ Predictable
✅ Reboot‑safe
✅ ALS‑friendly
✅ Proven in real use
Wrap up
I have tested and used this setup on Zoom calls. The most painful part is getting the windows snapped in a timely fashion. This is because the Zoom meeting window opens when the meeting starts, so we can’t be ready when the meeting starts. Making it even more annoying, once you open the chat, Zoom resizes the window which means you have to resnap. I always forget this.
I hope you find this useful. Drop a comment if you run into an issue or find a tip or improvement.
